
- GPG2
- Configuration of PKCS#11 Wrapper on Ubuntu
- GPG2 Setup
- Installing Gnupg-pkcs11-scd (version 0.11.0) package
- Create the Gnupg Directory and Environment Variables
- Create the Configuration Files
- Start the GPG Agent
- Retrieve and Import the Keys and Certificates into GPG2
- GPG2 Signing and Verification
- Additional Steps for Debian Signing and Verification
- Additional Steps for RPM Signing and Verification
- Conclusion
Imagine downloading an app and feeling good about it because it has a digital seal of approval from a trustworthy developer. This seal means that the software is legitimate and hasn’t been altered by anyone with bad intentions. For developers, it’s a great way to build trust and show they take security seriously. For users, it offers reassurance that the app won’t harm their devices. This whole process of adding a digital seal or signature to an app is known as code signing.
Now, let’s understand how Encryption Consulting’s PKCS11 Wrapper can help you achieve GPG2, Debian, and RPM Signing with faster speed and better efficiency.
NOTE: To perform Debian and RPM signings, you will still need to configure and set up GPG on your machine.
GPG2
GPG2, or GNU Privacy Guard 2, is a free, open-source implementation of the OpenPGP standard designed to provide powerful encryption and signing capabilities. Available on platforms like Ubuntu, it enables users to encrypt data and communications, ensuring confidentiality while also allowing digital signatures to verify authenticity.
By implementing GPG2 signing with Encryption Consulting’s PKCS11 Wrapper on Ubuntu, you can ensure the authenticity and integrity of your digital assets, mitigating risks associated with unauthorized access or tampering.
Configuration of PKCS#11 Wrapper on Ubuntu
Prerequisites
Before we look into the process of signing using GPG2 and our PKCS11 Wrapper in Linux (Ubuntu) machine, ensure the following are ready:
- Ubuntu Version: Ubuntu version 22.04 or later (tested environment is Ubuntu 24.02)
Now, we need to be logged in as the root user before we move forward with GPG2 signing.
sudo su

To set up PKCS#11 Wrapper, you will need to run the following commands and install some dependencies and packages on your Ubuntu machine:
- sudo apt-get install curl
- sudo apt-get install liblog4cxx12
Installing EC’s PKCS#11 Wrapper
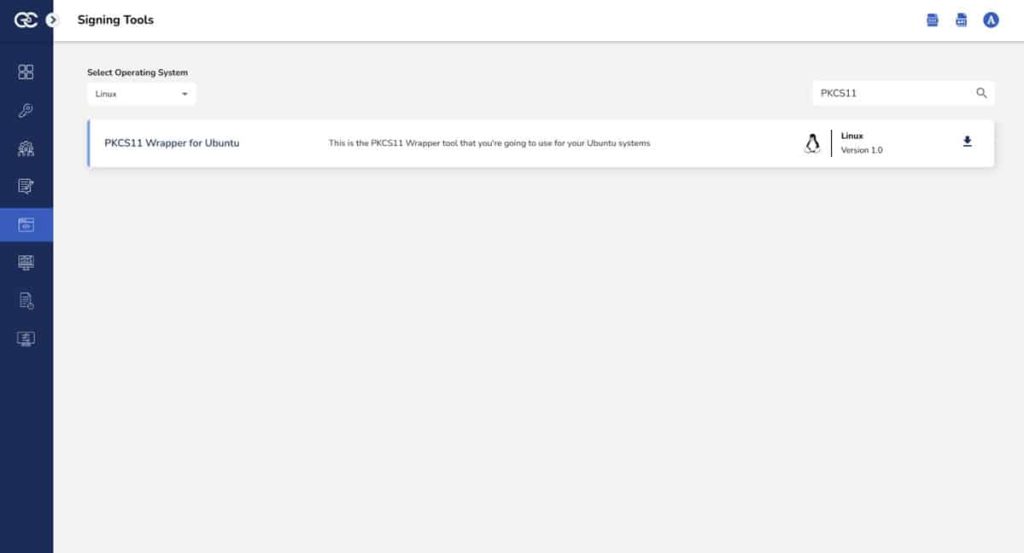
Step 1: Go to EC CodeSign Secure’s v3.02’s Signing Tools section and download the PKCS#11 Wrapper for Ubuntu.
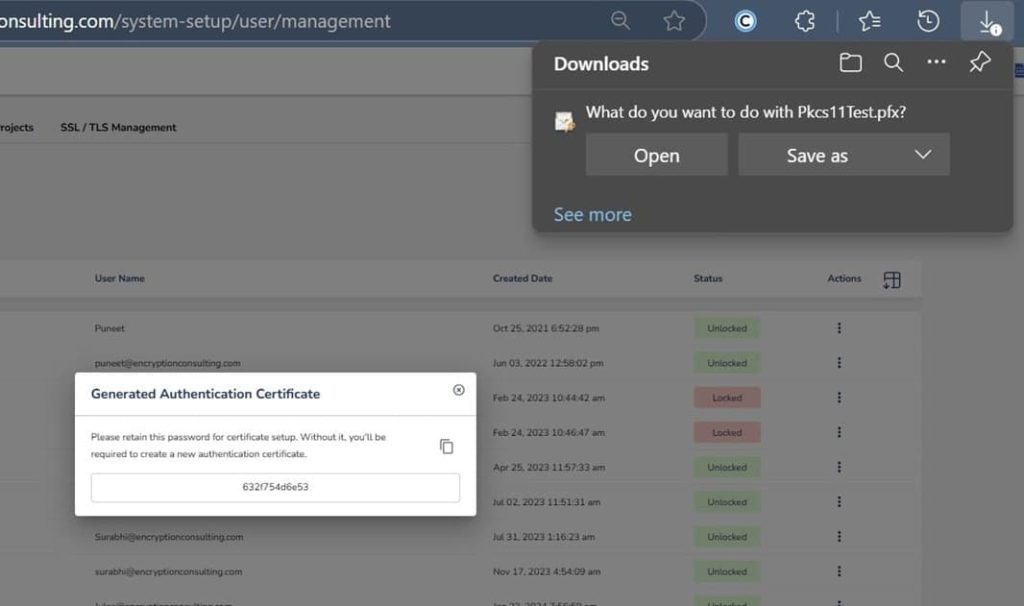
Step 2: After that, generate a P12 Authentication certificate from the System Setup > User > Generate Authentication Certificate dropdown.
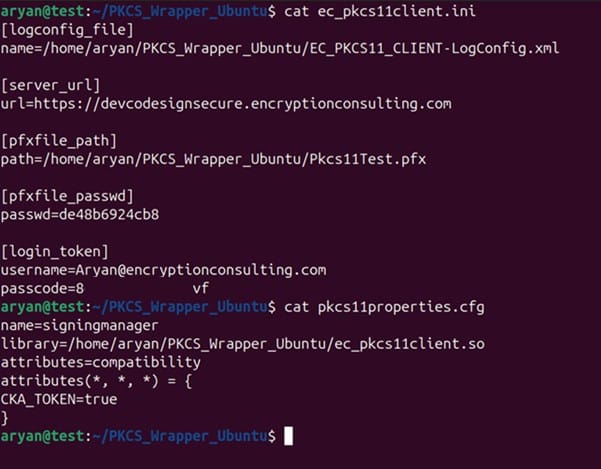
Step 3: Go to your Ubuntu client system and edit the configuration files (ec_PKCS#11client.ini and PKCS#11properties.cfg) downloaded in the PKCS#11 Wrapper.
Step 4: Add the environment variable for the pkcs11 client library
Run the below command to open the bashrc file
nano ~/.bashrc

Now add the EC_INI_FILE_PATH variable with the path of the .ini at the end of the bashrc file, like:
export EC_INI_FILE_PATH=/home/aryan/pkcs11-client/ec_pkcs11client.ini

Press Ctrl+X, then enter Y, and then press Enter to save.
Step 5: Reload the environment variables
source ~/.bashrc

Step 6: Check whether the variable has been set correctly
echo $ EC_INI_FILE_PATH

NOTE: If you can’t see the file location from echo commands, open a new terminal and try again.
GPG2 Setup
GPG2 stands out as a vital tool for organizations aiming to protect their data and communications while boosting operational effectiveness in a Ubuntu machine.
Installing Gnupg (version 2.5.4) package
Step 1: Check the default version of gnupg in your ubuntu machine.
sudo apt-cache policy GnuPG

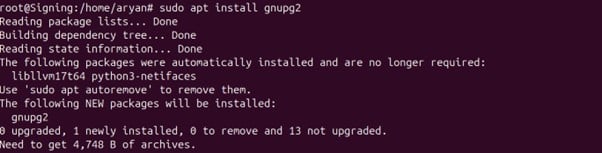
If the 2.5.4 version is present in your system, you can run the below command and go to the next section:
sudo apt install gnupg
Since this version is not present, you would need to perform the following steps:
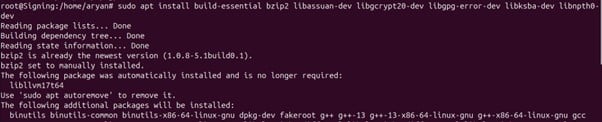
Step 2: Install the required build tools and dependencies for the gnupg package.
sudo apt install build-essential bzip2 libassuan-dev libgcrypt20-dev libgpg-error-dev libksba-dev libnpth0-dev
Step 3: Download the 2.5.4 version of gnupg using the below command
wget https://www.gnupg.org/ftp/gcrypt/gnupg/gnupg-2.5.4.tar.bz2

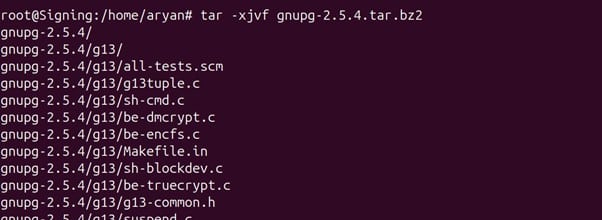
Step 4: Extract the Archive
tar -xjvf gnupg-2.5.4.tar.bz2
Step 5: Go to the newly created gnupg-2.5.4 directory
cd gnupg-2.5.4

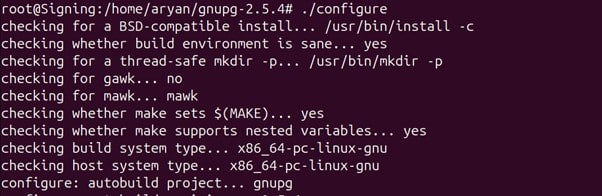
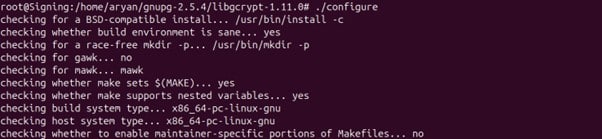
Step 6: Run the configure file
./configure
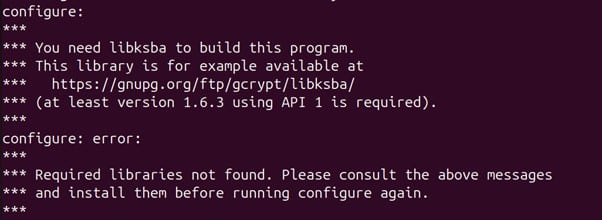
If this release of GnuPG requires some newer shared libraries that you have installed, the output of the configure command will tell you, as shown in the image below:
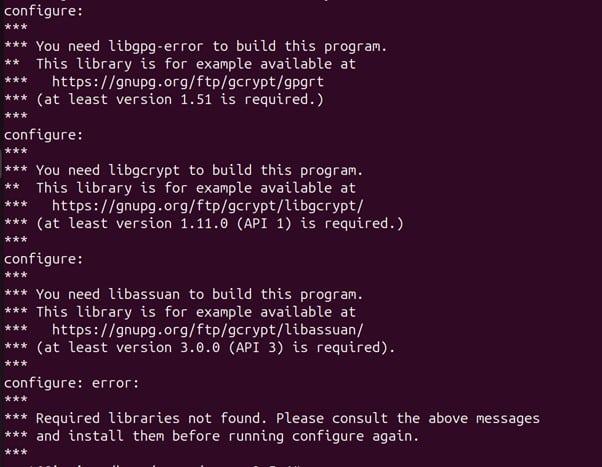
The above output of the configure command tells us we need to build and install the latest version of the libgpg-error, libgcrypt, and libassuan libraries.
Step 7: Install the additional dependencies for GPG2
1. Install the libgpg-error version from the link provided as the configure command output
wget https://gnupg.org/ftp/gcrypt/gpgrt/libgpg-error-1.51.tar.bz2

Extract the archive
tar xf libgpg-error-1.51.tar.bz2

Go to the newly created libgpg-error-1.51 directory
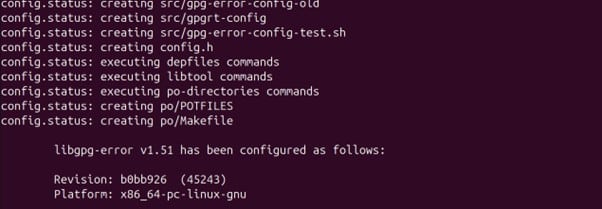
cd libgpg-error-1.51/

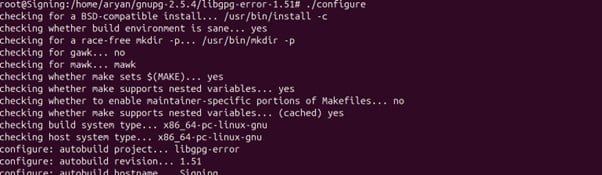
Run the configure file
./configure
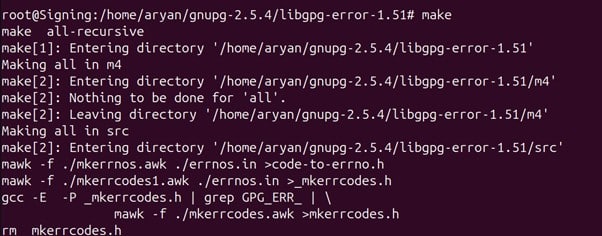
Run the make command
make
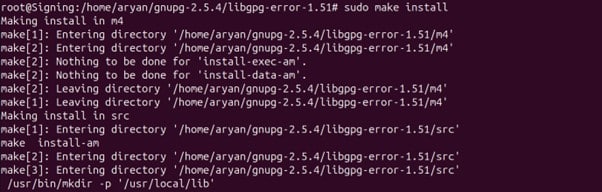
Install the package
sudo make install
Update the system’s dynamic linker cache using the below command:
sudo ldconfig

Go back one directory (../gnupg-2.5.4) to install other libraries
cd ..

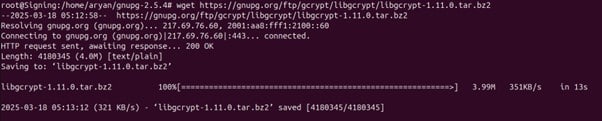
2. Install the libgcrypt version from the link provided as the configure command output
wget https://gnupg.org/ftp/gcrypt/libgcrypt/libgcrypt-1.11.0.tar.bz2
Extract the archive
tar xf libgcrypt-1.11.0.tar.bz2

Go to the newly created libgcrypt-1.11.0 directory
cd libgcrypt-1.11.0/

Run the configure file
./configure
Run the make command
make

Install the package
sudo make install
Update the system’s dynamic linker cache using the below command:
sudo ldconfig

Go back one directory (../gnupg-2.5.4) to install other libraries
cd ..

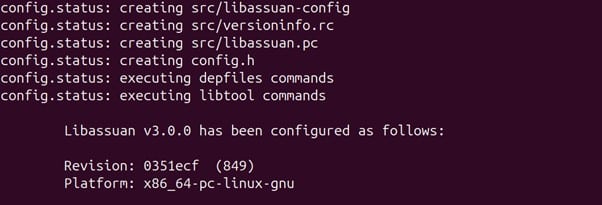
3. Install libassuan version from the link provided as the configure command output
wget https://gnupg.org/ftp/gcrypt/libassuan/libassuan-3.0.0.tar.bz2

Extract the archive
tar xf libassuan-3.0.0.tar.bz2

Go to the newly created libassuan-3.0.0 directory
cd libassuan-3.0.0/

Run the configure file
./configure
Run the make command
make
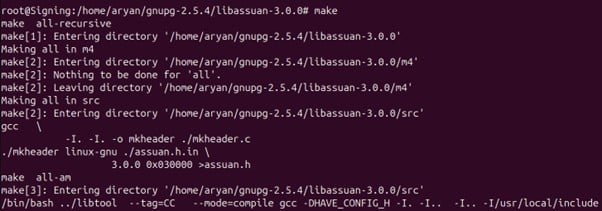
Install the package
sudo make install
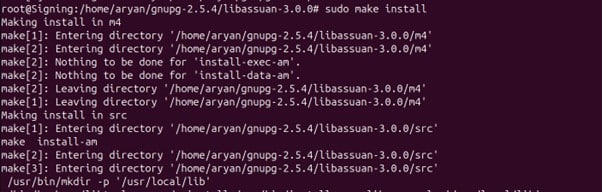
Update the system’s dynamic linker cache using the below command:
sudo ldconfig

After installing all the libraries as directed by the original GnuPG configure command result, change back to the GnuPG release directory,
cd ..

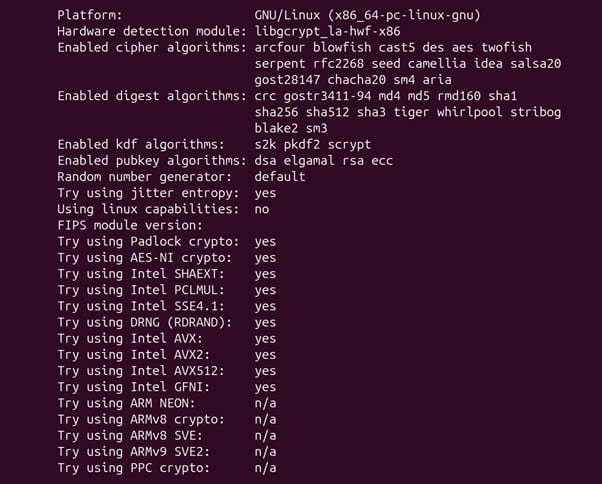
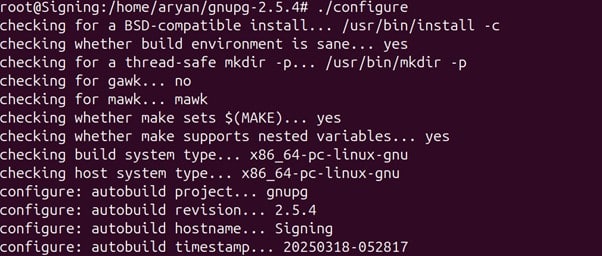
Step 8: Run the configure file from the gnupg-2.5.4 directory
./configure
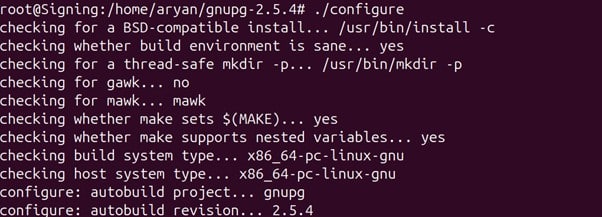
Check the output of the above command
Step 7: Repeat the installation process for the remaining additional dependencies for GPG2.
1. Install libksba version from the link provided as the configure command output
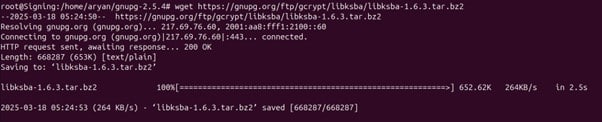
wget https://gnupg.org/ftp/gcrypt/libksba/libksba-1.6.3.tar.bz2
Extract the archive
tar xf libksba-1.6.3.tar.bz2

Go to the newly created libksba-1.6.3 directory
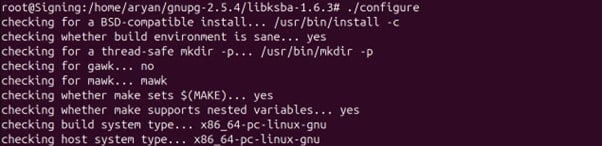
cd libksba-1.6.3/

Run the configure file
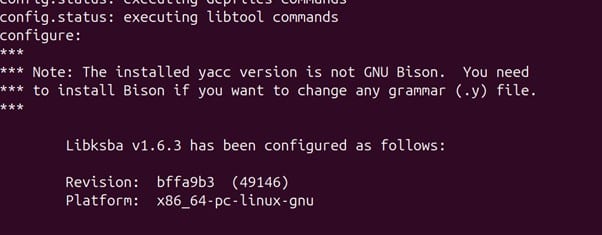
./configure
Run the make command
make
Install the package
sudo make install
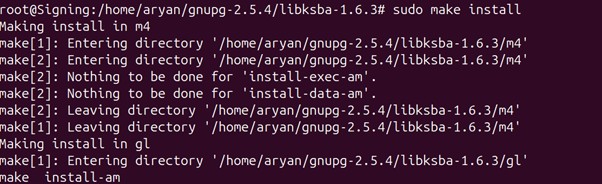
Update the system’s dynamic linker cache using the below command:
sudo ldconfig

Go back one directory (../gnupg-2.5.4)
cd ..

Step 9: Run the configure file again from the gnupg-2.5.4 directory
./configure
Check the output of the above command
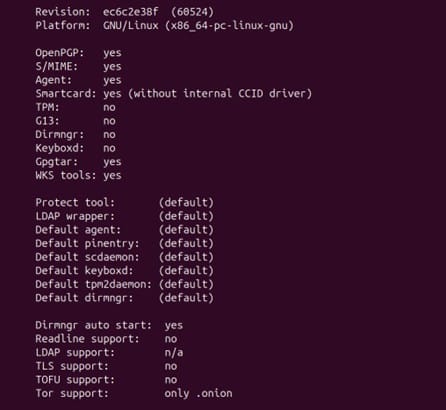
Since there is no error of the package version, we can move forward with the installation
Step 10: Run the make command
make
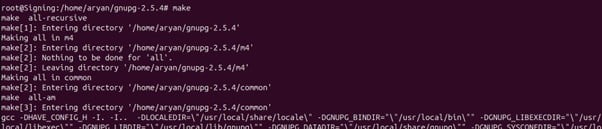
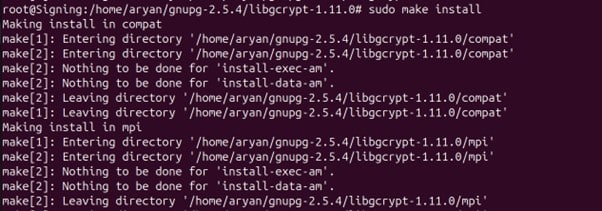
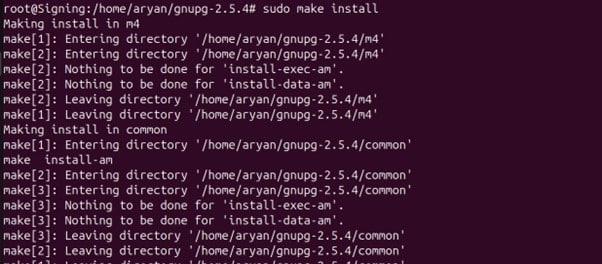
Step 11: Install the package
sudo make install
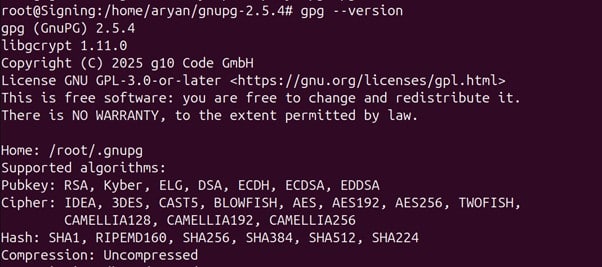
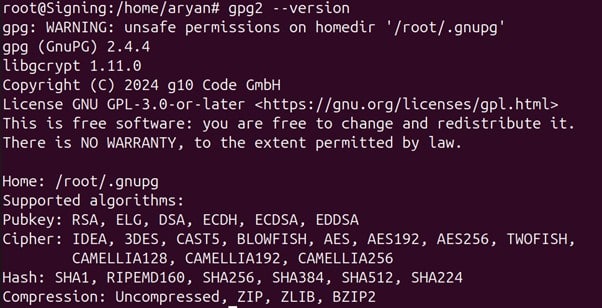
Step 12: Check whether gpg has been installed correctly or not
gpg –version
Step 13: Check whether gpg-agent has been installed correctly or not
gpg-agent –version

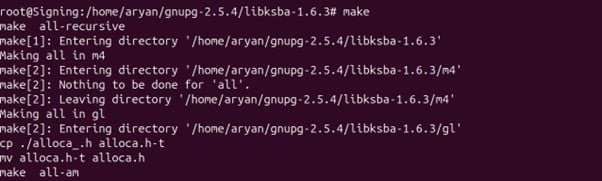
Installing Gnupg-pkcs11-scd (version 0.11.0) package
Step 1: Check the default version of gnupg-pkcs11-scd in your ubuntu machine
sudo apt-cache policy gnupg-pkcs11-scd

If the required version, 0.11.0, is installed on your machine, run the below command:
sudo apt install gnupg-pkcs11-scd
Otherwise, you would need to perform the following steps:
Step 2: Install the required build tools and dependencies for gnupg-pkcs11-scd package.
sudo apt install libpcsclite-dev libssl-dev pkg-config libpkcs11-helper1-dev

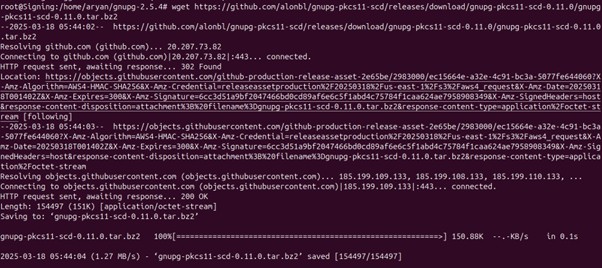
Step 3: Download the required package
wget https://github.com/alonbl/gnupg-pkcs11-scd/releases/download/gnupg-pkcs11-scd-0.11.0/gnupg-pkcs11-scd-0.11.0.tar.bz2
Step 4: Extract the Archive
tar xf gnupg-pkcs11-scd-0.11.0.tar.bz2

Step 5: Go to the newly created gnupg-pkcs11-scd-0.11.0 directory
cd ./gnupg-pkcs11-scd-0.11.0/

Step 6: Run the configure file
./configure
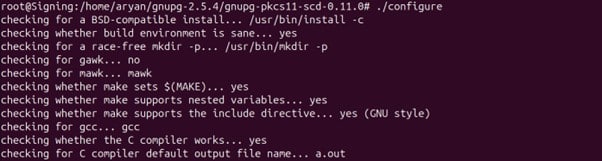
Check the output of the above command
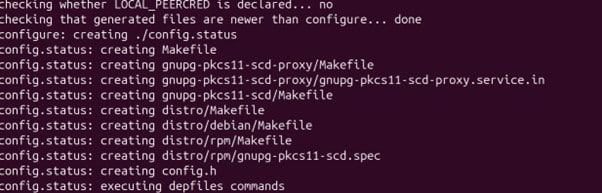
Since there is no error of package version, we can move forward with the installation
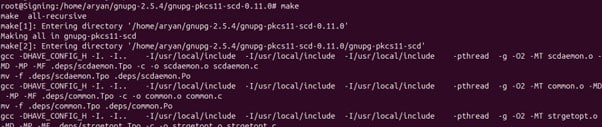
Step 7: Run the make command
make
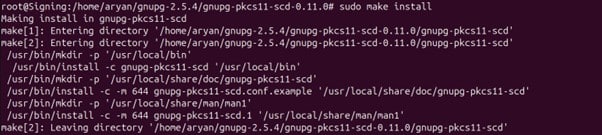
Step 8: Install the package
sudo make install
Step 9: Update the system’s dynamic linker cache using the below command:
sudo ldconfig

Step 10: Check whether gnupg-pkcs11-scd has been installed correctly or not
gnupg-pkcs11-scd –version

Create the Gnupg Directory and Environment Variables
Step 1: Check whether /root/.gnupg directory exists or not in your system
ls -ld /root/.gnupg

If not, then use the below command to make the directory
mkdir /root/.gnupg

Step 2: Add the environment variables for GPG Agent and Gnupg-pkcs11 socket directory.
Open the bashrc file using the below command
nano ~/.bashrc

Paste the below commands as per the file locations in your system, at the end of the file, like:
export GPG_AGENT_INFO=/root/.gnupg
export GNUPG_PKCS11_SOCKETDIR=/root/.gnupg/
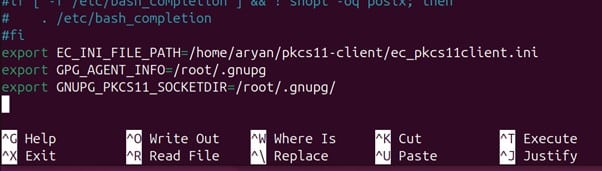
Press Ctrl+X, then enter Y, and then press Enter to save.
Step 3: Reload the bashrc file
source ~/.bashrc

Step 4: To Check these variables, run:
echo $GPG_AGENT_INFO
echo $GNUPG_PKCS11_SOCKETDIR

If you can’t see the file location from echo commands, open a new terminal and try again.
Create the Configuration Files
1. Create a gnupg-pkcs11-scd.conf file in /root/.gnupg directory
Run the following command to create/edit the file
nano /root/.gnupg/gnupg-pkcs11-scd.conf

Modify and configure the file as per the below command and your system’s file locations:
verbose
debug-all
providers ec
provider-ec-library /home/aryan/pkcs11-client/ec_pkcs11client.so

Press Ctrl+X, then enter Y, and then press Enter to save.
2. Create a gpg-agent.conf file in /root/.gnupg directory
Run the following command to create/edit the file
nano /root/.gnupg/gpg-agent.co

Modify and configure the file as per the below command and your system’s file locations:
verbose
debug-all
log-file /tmp/gpg-agent.log
scdaemon-program /usr/local/bin/gnupg-pkcs11-scd
pinentry-program /usr/bin/pinentry
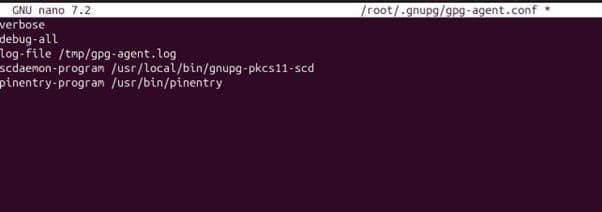
Press Ctrl+X, then enter Y, and then press Enter to save.
3. Create a gpg.conf file in /root/.gnupg directory
Run the following command to create/edit the file
nano /root/.gnupg/gpg.conf

Modify and configure the file as per the below command and your system’s file locations:
use-agent
#log-file /tmp/gpg.log
NOTE: you can uncomment the line (by removing the # symbol) to generate a gpg.log file

Press Ctrl+X, then enter Y, and then press Enter to save.
4. Create a pkcs11-scd.conf file in /root/.gnupg directory
Run the following command to create/edit the file
nano /root/.gnupg/pkcs11-scd.conf

Modify and configure the file as per the below command and your system’s file locations:
module /home/aryan/pkcs11-client/ec_pkcs11client.so
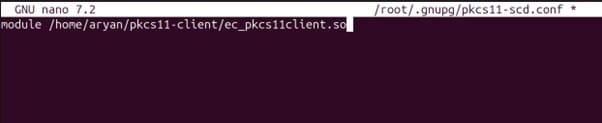
Press Ctrl+X, then enter Y, and then press Enter to save.
5. Create a scdaemon.conf file in /root/.gnupg directory
Run the following command to create/edit the file
nano /root/.gnupg/scdaemon.conf

Add the below command to this file
disable-ccid

Press Ctrl+X, then enter Y, and then press Enter to save.
Start the GPG Agent
Step 1: To check if gpg-agent is running on your ubuntu machine
ps -aef | grep gpg

If any agent is already running, you will need to kill that instance and start a new one.
Step 2: To kill an instance of the agent, use the following command with the changes to the PID number (number after the “root” user in the above image) as per your machine
kill -9 134028

kill -9 136706

Step 3: Start a new gpg agent
sudo gpg-agent –verbose –debug-level advanced –daemon

Step 4: Check again that only one gpg-agent is running on your ubuntu machine
ps -aef | grep gpg

Retrieve and Import the Keys and Certificates into GPG2
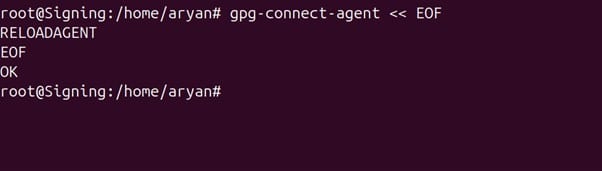
Step 1: Reload the agent
gpg-connect-agent << EOF
> RELOADAGENT
> EOF
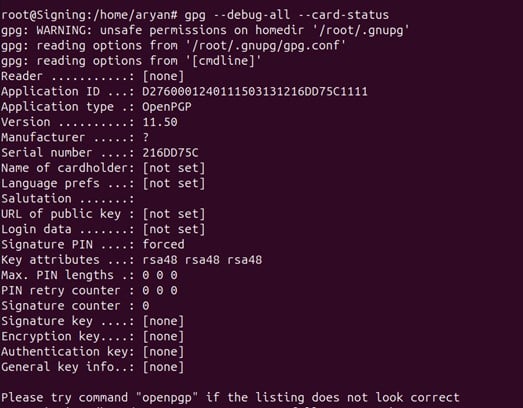
Step 2: Retrieve card status:
gpg –debug-all –card-status
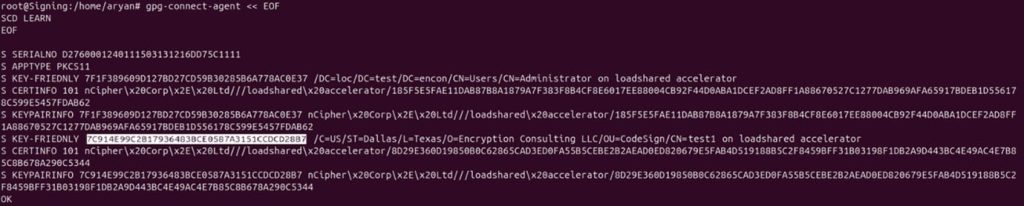
Step 3: Get the key friendly names and certificates
gpg-connect-agent << EOF
> SCD LEARN
> EOF
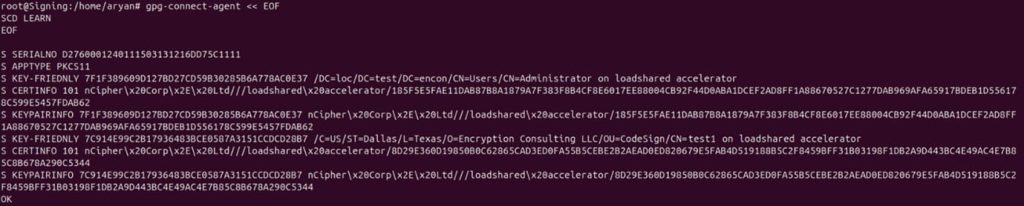
Step 4: Copy the required KEY FRIENDLY Id
You can compare the respective CKA_ID of the key you want to use for signing from CodeSign Secure portal and copy the KEY FRIENDLY Id.
Step 5: Import key into GPG 2
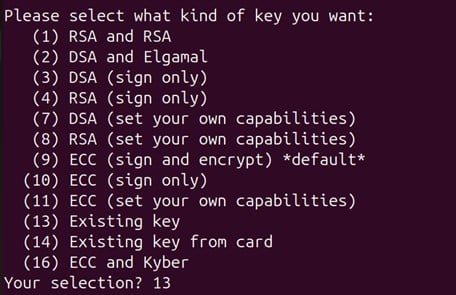
gpg –expert –full-generate-key

This command will ask you for various inputs to properly import and set the permissions for the key in your machine.
First, it will ask you to select a number from the list. You will need to enter 13 as the key was already created from CodeSign Secure portal.
Then, you will need to enter the KEY FRIENDLY Id that you had taken from earlier steps.

It will then ask you to confirm the permissions for this key. Type “Q”.
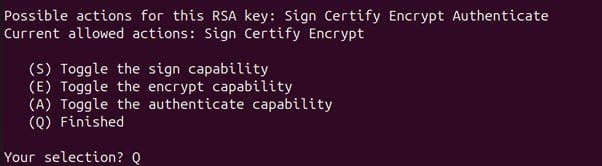
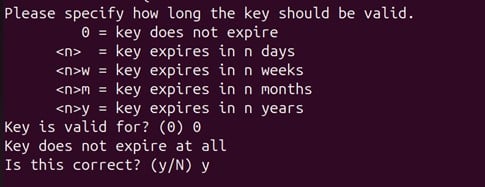
Now, you will need to set the key expiry date in your system. The default selection is “key does not expire.”
Finally, it will prompt you to enter the key identification details for easier system access. Provide the name and email address for that key and confirm your settings by entering “O.”

Your key will successfully get imported into GPG2 and now can be used for signing.

NOTE: Now you have GPG2 set up and installed on your machine.
To perform GPG2 Signing, go to the section (GPG2 Signing and Verification)
To perform Debian Signing, go to the section (Additional Steps for Debian Signing and Verification)
To perform RPM Signing, go to the section (Additional Steps for RPM Signing and Verification)
GPG2 Signing and Verification
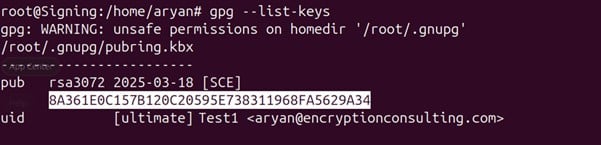
Step 1: List all the keys available for GPG2 signing
gpg –list-keys
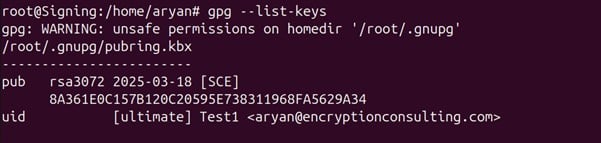
Step 2: Copy the pub key ID for the key you want to use for signing.

Step 3: Look for the file that you will sign using the key we just imported into GPG2.

Step 4: Run the signing command
gpg –sign –default-key <PUB Key ID> <File Path that needs to be signed>
A sample command is provided below
gpg –sign –default-key 8A361E0C157B120C20595E738311968FA5629A34 /home/aryan/pkcs11-client/testfile

It has successfully generated a signature file (testfile.gpg).
Step 5: Run the verification command
gpg –verify <Generated Signature Path>
A sample command is provided below
gpg –verify /home/aryan/pkcs11-client/testfile.gpg

Additional Steps for Debian Signing and Verification
Debian signing relies on GPG2 (GNU Privacy Guard) keys, so before proceeding, you will need to install and set up GPG2 on your system.
Step 1: List all the keys available for GPG2 signing
gpg –list-keys

Step 2: Copy the pub key ID for the key you want to use for signing.
Step 3: Mention the pub key ID in the gpg.conf file that we created earlier.
Open the gpg.conf using the below command:
nano /root/.gnupg/gpg.conf

This should be the content in inside this file.

Now, add the respective pub key ID as the default key at the end of the file, like:
default-key 8A361E0C157B120C20595E738311968FA5629A34

Press Ctrl+X, then enter Y, and then press Enter to save.
Step 4: Install the Debian package utility using the below command
sudo apt-cache policy dpkg-sig

If the above gives an error or returns an empty output, refer to the below steps to download and install dpkg-sig package
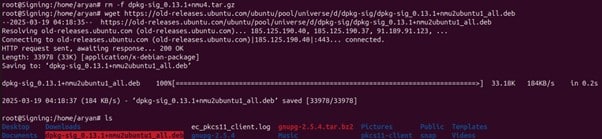
1. Download dpkg-sig package
wget https://old-releases.ubuntu.com/ubuntu/pool/universe/d/dpkg-sig/dpkg-sig_0.13.1+nmu2ubuntu1_all.deb
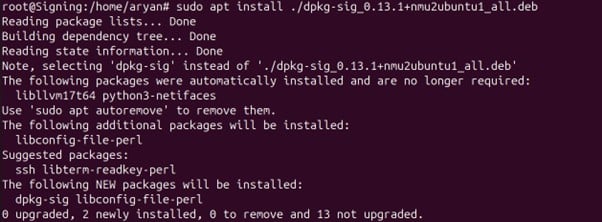
2. Install the package
sudo apt install ./dpkg-sig_0.13.1+nmu8~noble_all.deb
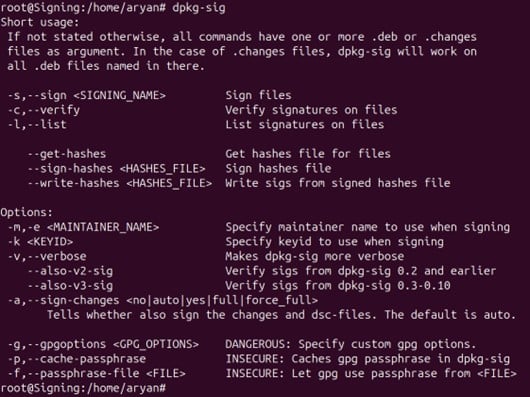
3. Check whether dpkg-sig has installed correctly in your system
dpkg-sig
Step 5: Locate the Debian file, which you need to sign using the key that you had set in the gpg.conf file as the “default key.”

Step 6: Run the Signing Command
dpkg-sig –sign builder <File Path you want to sign>
A sample command is provided below:
dpkg-sig –sign builder /home/aryan/pkcs11-client/testsample.deb

Additional Steps for RPM Signing and Verification
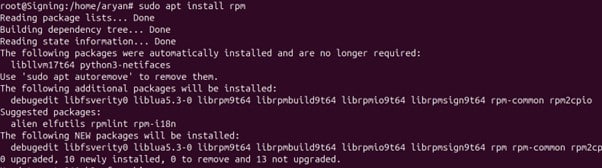
Step 1: Install the rpm package on your machine
sudo apt install rpm
Step 2: Check whether rpm has been installed correctly
rpm –version

Step 3: Install gnupg2 package
sudo apt install gnupg2
Step 4: Check whether gpg2 has installed correctly
gpg2 –version
Step 5: List all the keys available for GPG2 signing
gpg –list-keys

Step 6: Copy the set pub key uid name for the key you want to use for signing.

Step 7: Export the respective key to a file with the pub key uid name as per your setup, like:
gpg –export -a “Test1” > ~/RPM-GPG-KEY

Step 8: Import this file into RPM
rpm –import ~/RPM-GPG-KEY

Step 9: Create a .rpmmacros file, which will tell the RPM package which GPG key to use for signing.
nano ~/.rpmmacros

Modify the ~/.rpmmacrors with file locations as per the paths set in your ubuntu machine and the required pub key uid name that we got from Step 5 in this section
%_gpg_name Test1
%_signature gpg
%_gpg_path /root/.gnupg/
%__gpgbin /usr/bin/gpg2
%__gpg_check_password_cmd /bin/true
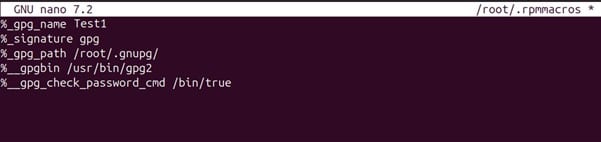
Press Ctrl+X, then enter Y, and then press Enter to save.
Step 10: Locate the RPM file that you need to sign using the key we just imported into RPM.

Step 11: Run the signing command
rpm –verbose –addsign <File Path to be signed>
A sample command is provided below:
rpm –verbose –addsign /home/aryan/pkcs11-client/RPMsample.rpm

Step 12: Run the verification command
rpm –verbose –checksig <File Path which was signed>
A sample command is provided below:
rpm –verbose –checksig /home/aryan/pkcs11-client/RPMsample.rpm
Conclusion
Encryption Consulting’s PKCS#11 setup for GPG2, Debian, and RPM signing on Ubuntu makes it easy and secure for organizations to use this powerful tool. Also, with the improved key management and security features from our code signing solution, CodeSign Secure, users can confidently protect their sensitive data, which makes it a great asset for organizations of all sizes.
CodeSign Secure enhances this integration by offering features like Hardware Security Module (HSM) support, detailed audit trails, and adherence to security best practices to ensure compliance and accountability, safeguarding signing keys, and maintaining trust. Together, these tools provide a comprehensive solution that optimizes signing processes, boosts operational efficiency, and strengthens security for organizations and users.
- GPG2
- Configuration of PKCS#11 Wrapper on Ubuntu
- GPG2 Setup
- Installing Gnupg-pkcs11-scd (version 0.11.0) package
- Create the Gnupg Directory and Environment Variables
- Create the Configuration Files
- Start the GPG Agent
- Retrieve and Import the Keys and Certificates into GPG2
- GPG2 Signing and Verification
- Additional Steps for Debian Signing and Verification
- Additional Steps for RPM Signing and Verification
- Conclusion