Hardware Security Modules, or HSMs, can be a complicated, but important, piece of security infrastructure to maintain. There are day to day tasks to complete in checking on the functionality of the HSM, and there are also tasks that must be completed to upgrade the HSM to make sure that the latest patches are in place.
This can seem like a daunting task, but it is actually a relatively simple procedure. One of the more complicated parts of this is taking care of the pre-requisite tasks for the other pieces of the infrastructure that are integrated with the HSM.
Today, we will go over how to upgrade the firmware and software of a Thales Luna Network HSM. In this example, we will pretend you have an Issuing Certificate Authority integrated with your HSM, and that the HSM in use is a PED-Based HSM.
Pre-Requisite Tasks
There are a number of pre-requisite tasks that must be completed before updating the Network HSM software and firmware, especially if your HSM in question is connected to a client in a production environment. For this example, we will assume your HSM is connected to a Certificate Authority (CA) in a production environment.
The first step to complete any hardware upgrade is to ensure it is done at a non-intrusive time, with the proper safety precautions in place. If the upgrade somehow fails, then this could cause significant damage to the organization.
Safety precautions like ensuring that the HSMs and CAs are in a high availability cluster, which ensures that if one upgrade fails, the other CAs/HSMs can take over while the issue is diagnosed. Additionally, a backup of the HSM should be taken, and the proper teams should be notified about the potential for CA or HSM non-connectivity for a short period of time.
After these tasks are taken care of, certain HSM and Public Key Infrastructure tasks must be completed. A Certificate Revocation List, or CRL, should be generated or updated before the upgrade occurs. This will protect the Public Key Infrastructure, or PKI, from any issues that may occur during the upgrade process while the issue is diagnosed and fixed. The below steps are an example of how to issue a CRL from a Microsoft PKI.
- First, we must make sure the Certificate Authority is running by checking PKIView.msc.
- Next, we open the Certificate Authority from PKIView.msc.
- Now, navigate to the revoked certificates folder.
-
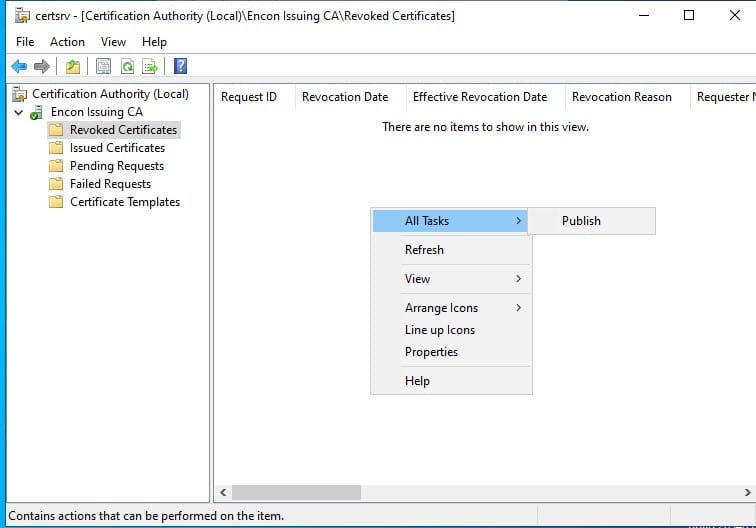
Right-click the revoked certificates folder and then select All Tasks and Publish
-
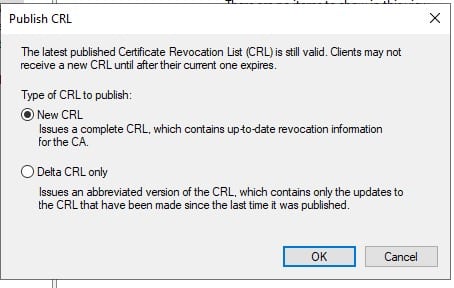
Then, select CRL and Publish.
-
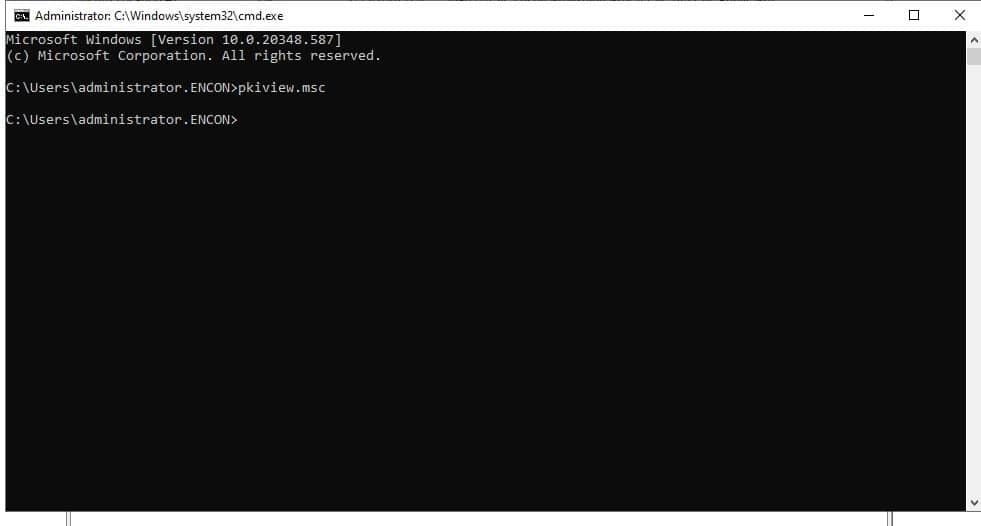
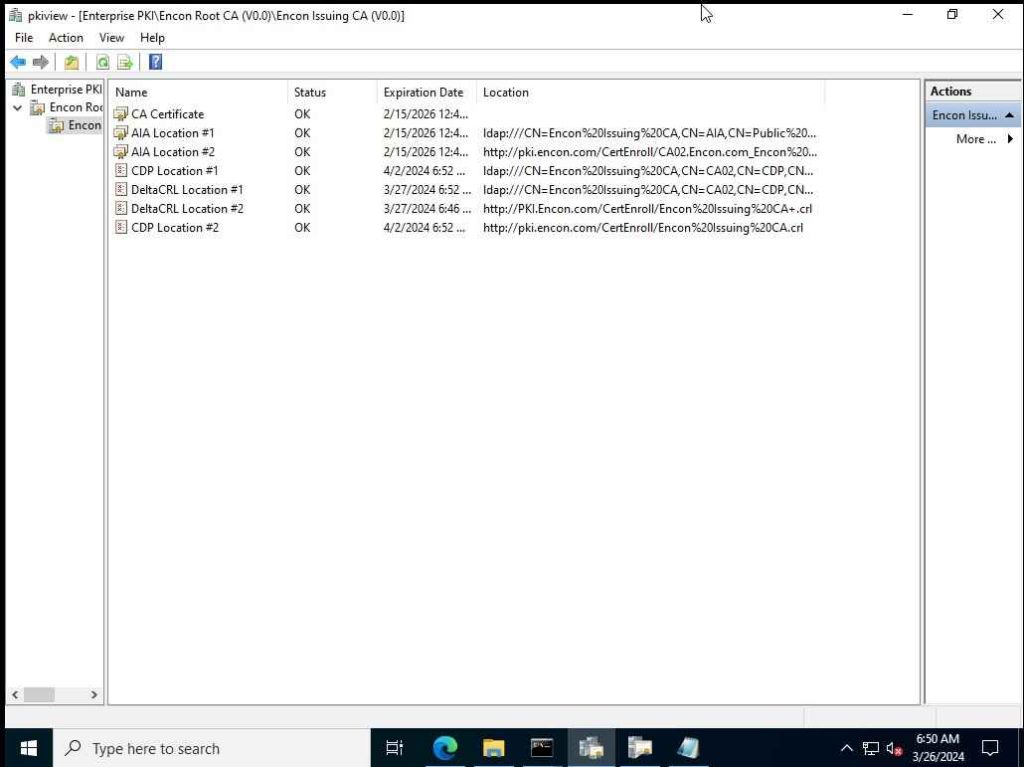
Finally, to check if the CRL has been renewed correctly, open a command prompt and run PKIView.msc, expand the Issuing CA tab and check the CDP point’s expiry date.
Additionally, there must be a system with the ability to transfer the software package to the HSM for the upgrade. This includes any firewall rules that must be in place to allow the transfer of the software package to the HSM. If that step is impossible, a team member must have direct physical access to the HSM, along with a crossover cable, to allow the transfer of the software package to the HSM for the upgrade.
Upgrading Planning
When planning to upgrade your HSM, having a correct path in place is important. Ensuring all pre-requisites are met and are a part of your plan should be your first step. After this, the proper upgrade path should be determined. What this means is that if you are on a very old version of the HSM software, say 6.0, there is a specific path in place that must be done to get to the latest version of the software.
You cannot go directly from version 6.0 to version 7.7, you must first upgrade to version 6.5, then version 7.0, and then you can go to version 7.7. This is just an example of how the upgrade path could look.
Finally, a rollback plan should be in place so that if the software upgrade fails, you can rollback to a proper build of the HSM. Additionally, a Disaster Recovery plan should already be designed before upgrading, as if there is a major issue when upgrading, that HSM will need to be recovered.
Upgrading from a Network Connection
Now that the pre-requisite steps have been taken care of, we can focus on the actual upgrade itself. This section focuses on the upgrade process if the network has been setup for HSM properly and you have a client or system that can reach the HSM to transfer the files for the upgrade. If you need to use the crossover cable method, skip to the next section. Below are the series of steps required to upgrade your HSM’s software and firmware.
- Transfer the. spkg update file to the HSM using the following command: C:\Program Files\SafeNet\LunaClient>: pscp lunasa_update-7.7.0-317.spkg admin@<HSM IP>:
- Log into the HSM via SSH: C:\Program Files\SafeNet\LunaClient>: ssh admin@<HSM IP>
- Login as the HSM Security Officer (SO): lunash>: hsm login
- Follow the prompts on the PED to log in as SO.
- Check that the package was successfully transferred to the HSM: lunash>: package listfile
- Verify the package using the authorization code in the file lunasa_update-7.7.0-317.auth: lunash>: package verify lunasa_update-7.7.0-317.spkg -a <authentication code string>
- Update the software: lunash>: package update lunasa_update-7.7.0-317.spkg -a <authentication code string>
- If the software update does not automatically reboot the HSM, run the following command: lunash>: sysconf appliance reboot
- SSH back into the HSM: C:\Program Files\SafeNet\LunaClient>: ssh admin@<HSM IP>
- Upgrade the firmware: lunash>: hsm firmware upgrade
- Verify the firmware has been upgraded: lunash>: hsm show
Upgrading from a Direct Connection
This section focuses on the upgrade process if the network has not been setup for the HSM. If this is the case, then a crossover cable will be necessary to transfer the files to the HSM. This will require a direct connection to the HSM. Below are the series of steps required to upgrade your HSM’s software and firmware.
-
Connect the crossover cable to any of the eth ports.
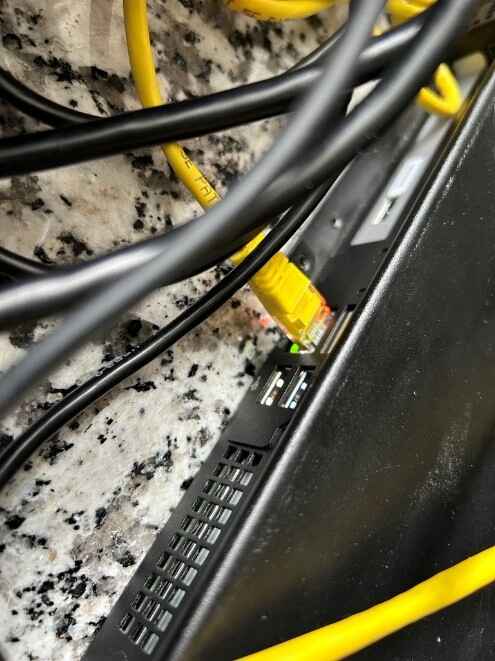
-
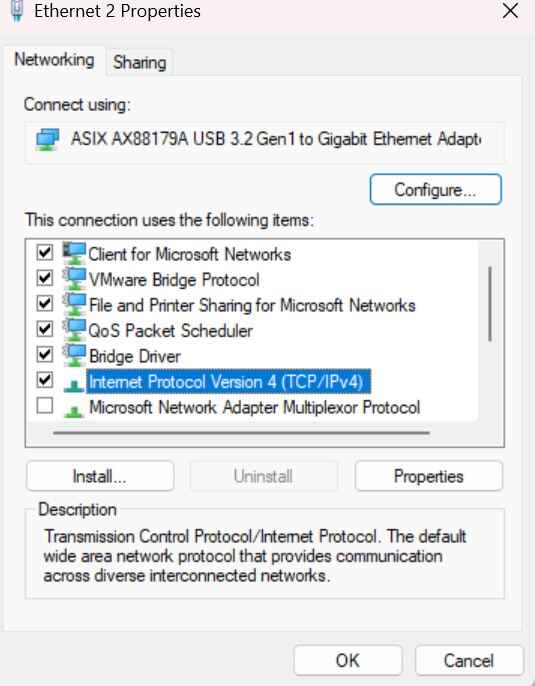
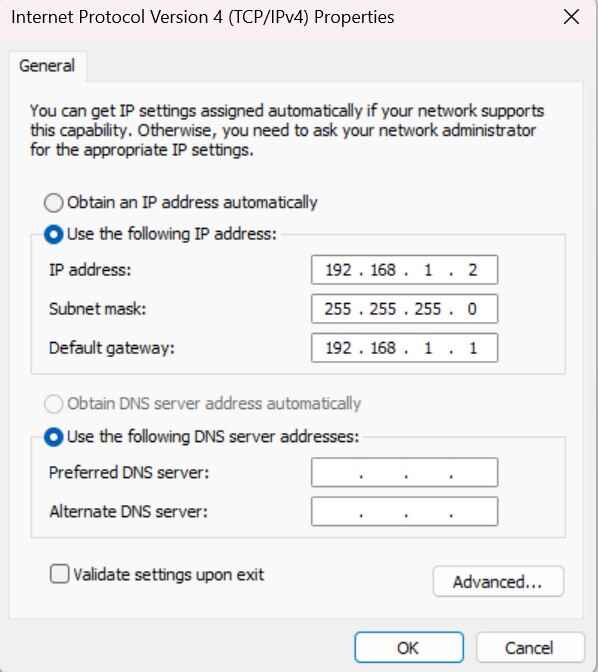
Setup the IP address on your computer: Control Panel > Network and Internet > Network and Sharing Center > Left Click the Ethernet Connection > Properties > Internet Protocol Version 4 (TCP/IPv4). Select the Properties button and update the static IP address of your computer. Use the below images as a guide.
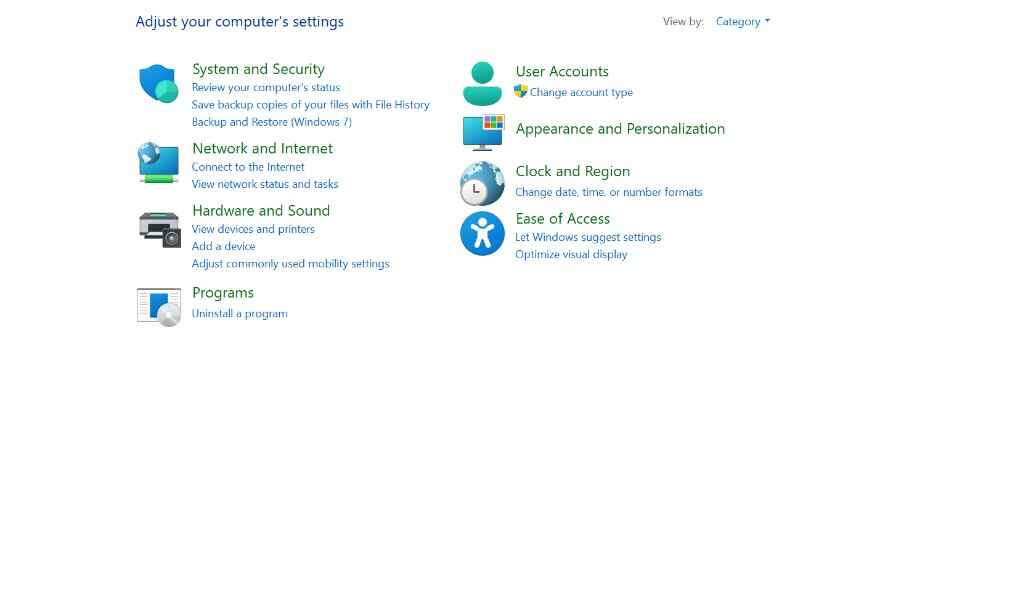

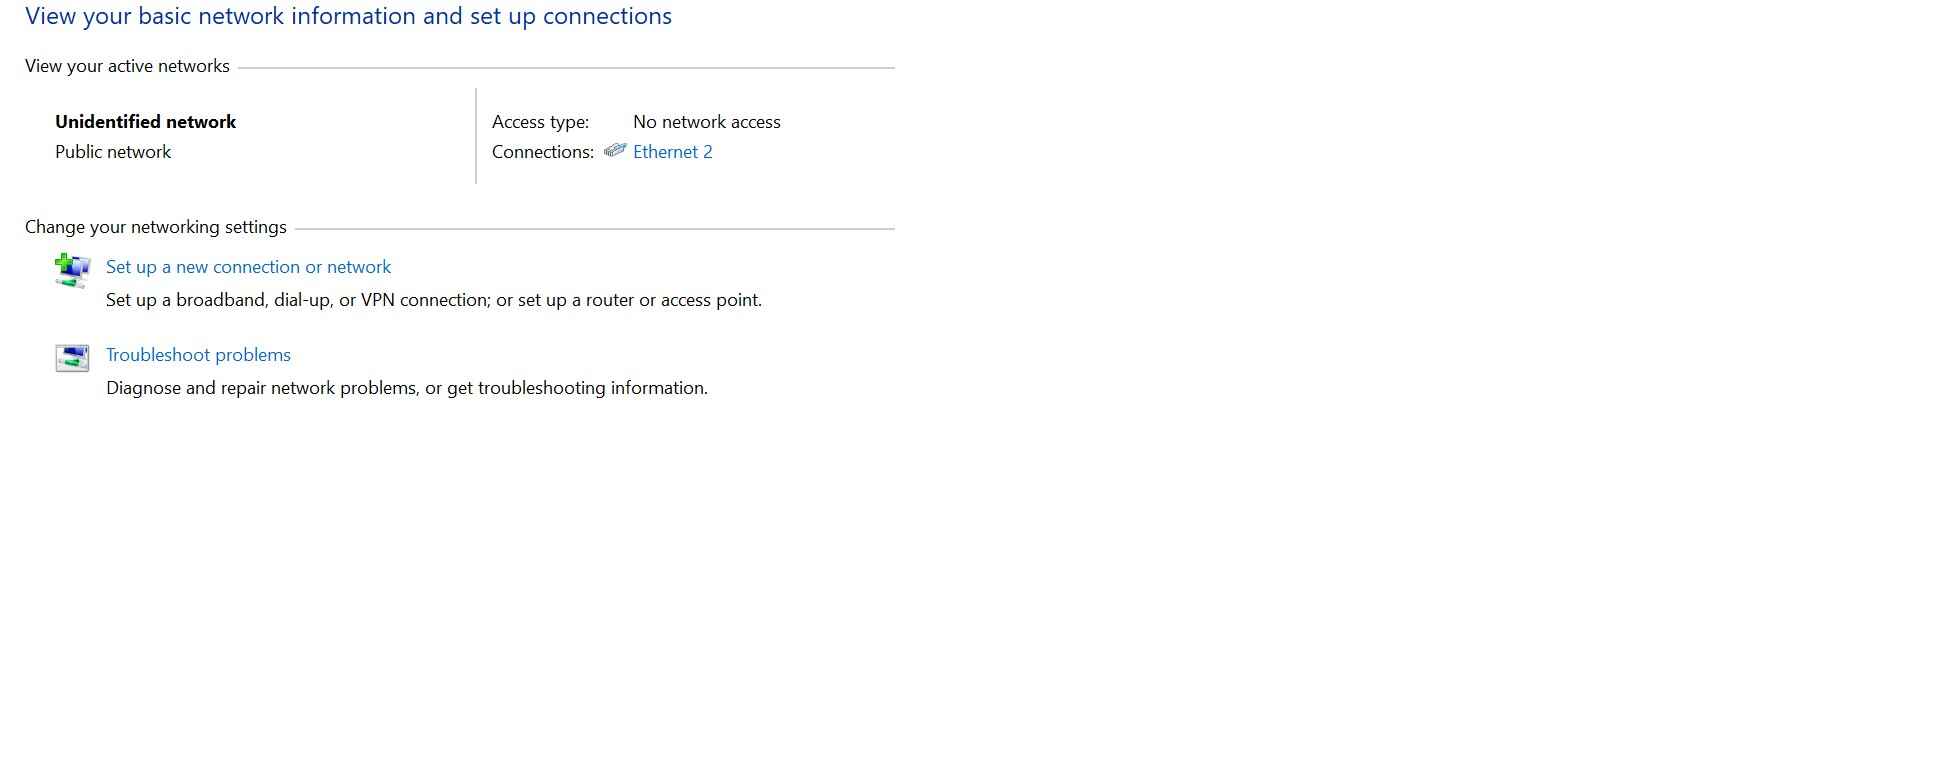
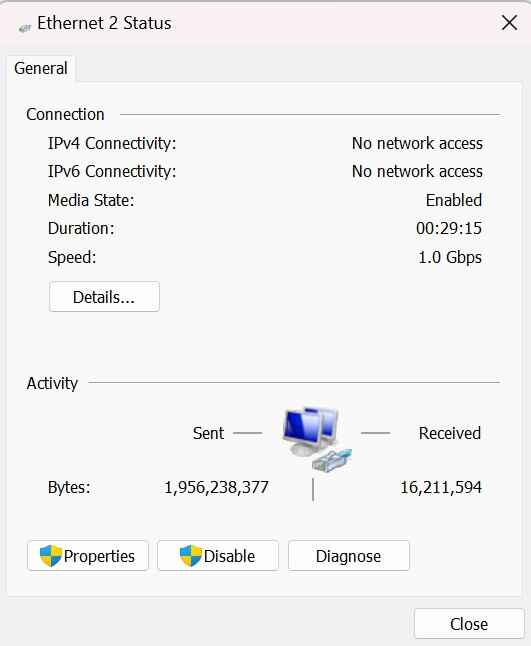
-
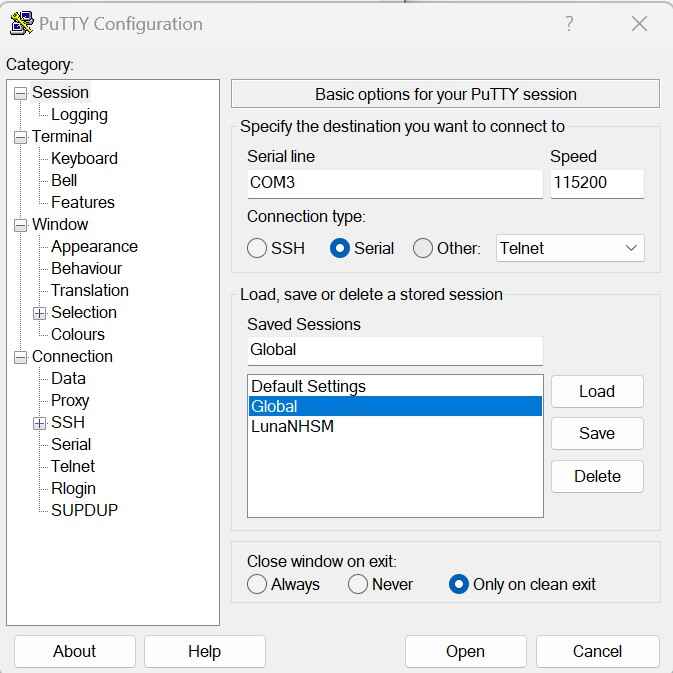
Serially connect to the HSM as admin:
- Setup the IP address of the HSM using the same gateway and netmask: lunash>: network interface static -device eth0 -ip 192.168.1.3 -netmask 255.255.255.0 -gateway 192.168.1.1
- Reboot the HSM: lunash>: sysconf appliance reboot
- Download the lunaclient software version from Thales.
-
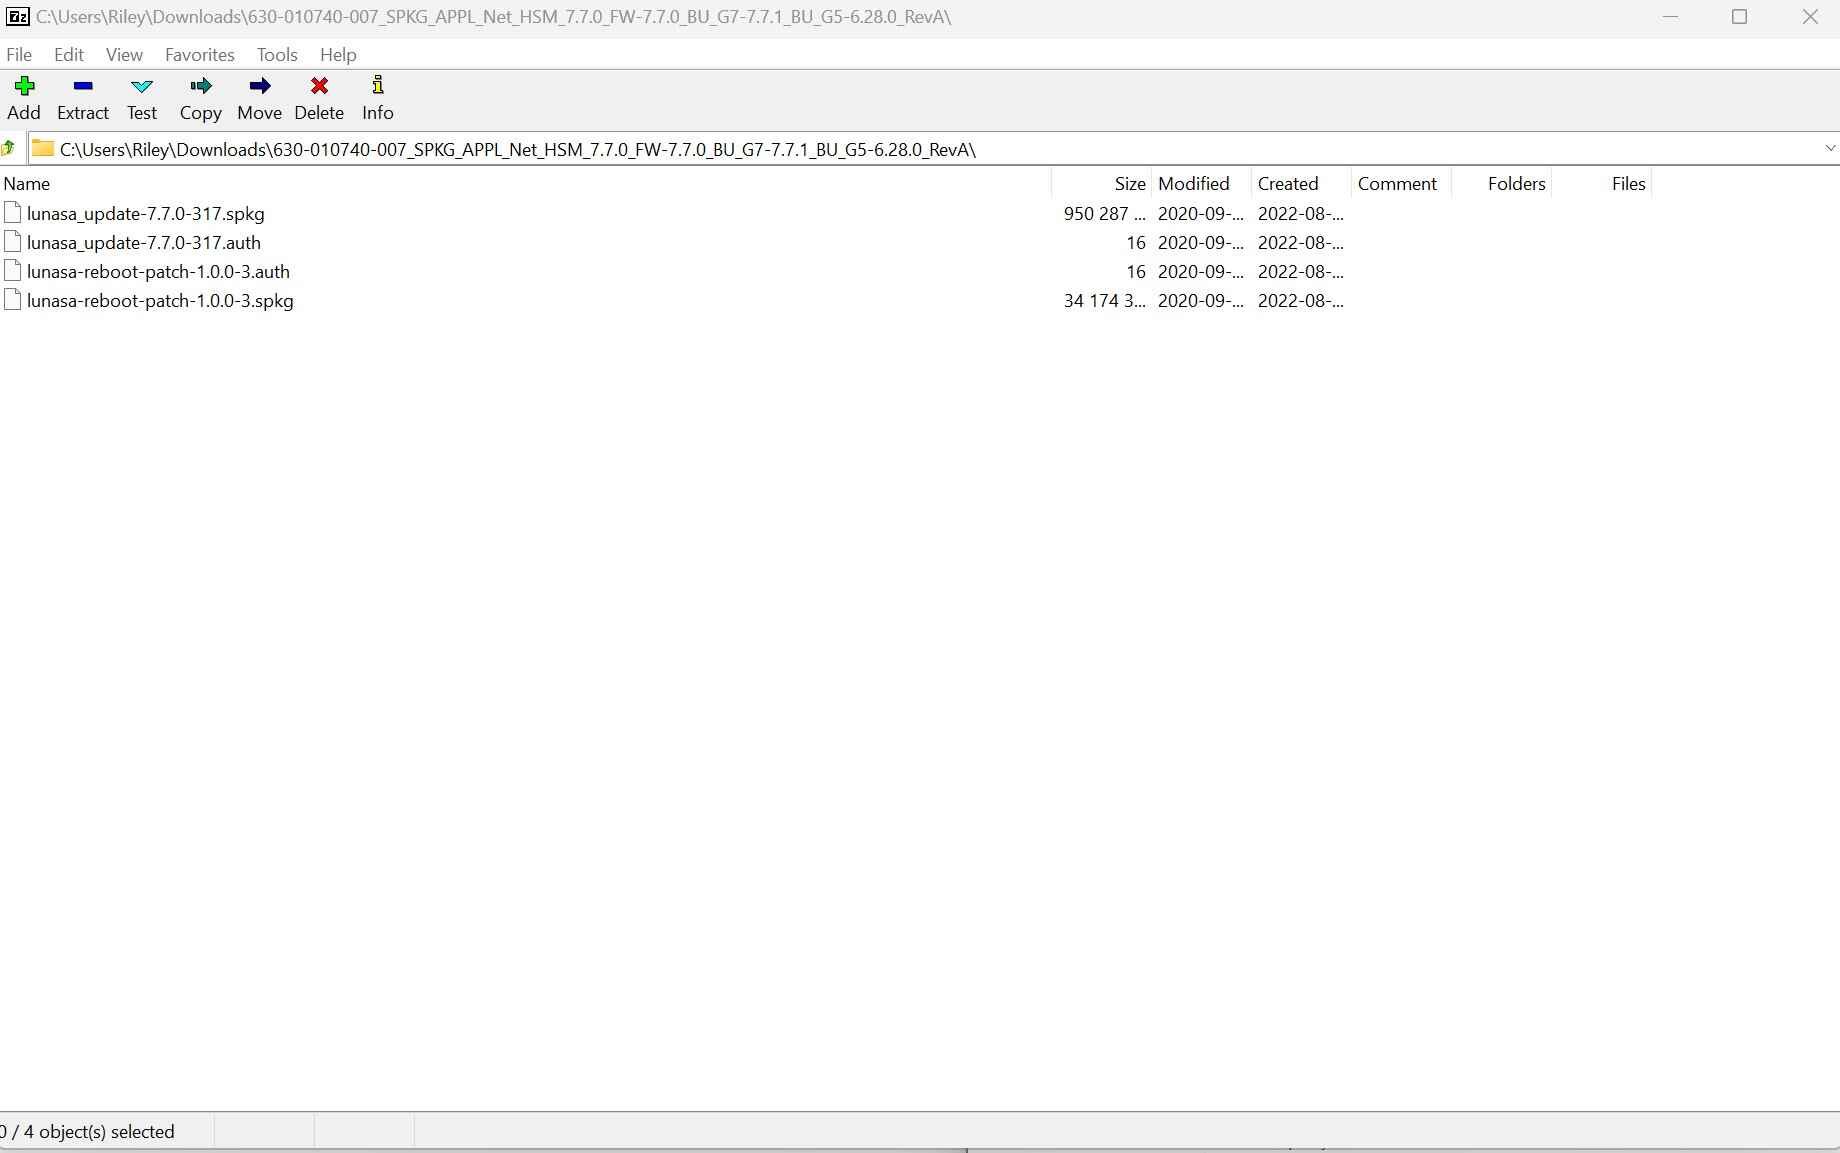
Using 7zip, untar the file and you should see four files within:
- Open an Administrator Command Prompt and go to the LunaClient directory: C:\>: cd C:\Program Files\SafeNet\LunaClient
- Transfer the. spkg update file to the HSM: C:\Program Files\SafeNet\LunaClient>: pscp lunasa_update-7.7.0-317.spkg admin@192.168.1.3:
-
Log back into the HSM serially as admin:
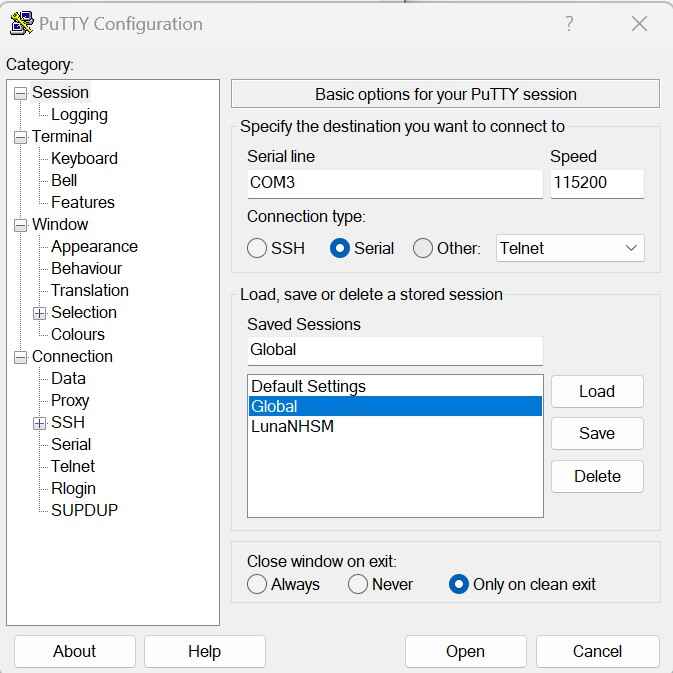
- Login as the HSM Security Officer (SO): lunash:> hsm login
- Follow the prompts on the PED to login as SO.
- Check that the package was successfully transferred to the HSM: lunash:> package listfile
- Verify the package using the authorization code in the file lunasa_update-7.7.0-317.auth: lunash:> package verify lunasa_update-7.7.0-317.spkg -a
- Update the software: lunash:> package update lunasa_update-7.7.0-317.spkg -a
- If the software update does not automatically reboot the HSM, run the following command: lunash:> sysconf appliance reboot
- Log back into the HSM as admin and login as the SO (Blue key) after: lunash>: hsm login
- Follow the prompts on the PED.
- Upgrade the firmware: lunash:> hsm firmware upgrade
- Verify the firmware has been upgraded: lunash:> hsm show
Post Upgrade Tasks
Now that the HSM has been upgraded in both its firmware and software, a few post upgrade tasks are required. First, we must log back into the HSM via SSH and check that the upgrade has gone successfully with the following command: Lunash>: Hsm show
Another vital step after upgrading the HSMs is to issue a CRL, to ensure that the CRL can be properly deployed after the upgrade process.
- First, we must make sure the Certificate Authority is running by checking PKIView.msc.
- Next, we open the Certificate Authority from PKIView.msc.
- Now, navigate to the revoked certificates folder.
-
Right-click the revoked certificates folder and then select All Tasks and Publish

-
Then, select CRL and Publish.

-
Finally, to check if the CRL has been renewed correctly, open a command prompt and run PKIView.msc, expand the Issuing CA tab and check the CDP point’s expiry date.


Along with these specific post upgrade tasks, there are a number of different tasks that should continuously be done across the lifetime of the HSM being in use. Monitoring the HSMs is a vital task that must be done at all times.
The team in charge of the HSM should be ensuring every day that there is no outage with it that would impact production services. Additionally, the HSM monitoring team should also stay up to date on the latest versions of software and firmware for the HSM that Thales releases. This will ensure that the HSMs in use will always be upgraded with the latest security patches and bug fixes that Thales may provide.
Conclusion
As you can see, the process of upgrading a Thales Network HSM is not as difficult as it may seem. These steps can be followed any time you need to upgrade software or firmware, with minor changes in the pre-requisite and post upgrade steps, depending on what types of applications or other infrastructure pieces may be integrated with your HSM.
If you are in need of HSM configuration, DR planning, or application on-boarding to HSMs, visit our website at www.encryptionconsulting.com. At Encryption Consulting, we have a focus on encryption advisory services, PKI Design and Implementation, and HSM Design and Implementation. Encryption Consulting provides roadmaps and recommendations for future upgrades to HSMs, allowing your company to stay informed and ensure you align with all standard IT strategies.


